Deploying ASP.NET 7 Projects with Railway
Railway is a startup cloud infrastructure provider that has gained traction for being easy to use and cheap for hobbyists. Let's get a .NET 7 Blazor WASM app up and running with it!

Nevermind that I haven't posted in more than 6 years, Railway is a startup cloud infrastructure provider that has gained a fair amount of traction for being easy to use and very cost effective to get started with. It's pretty barebones right now, but that makes it especially great for hobbyist projects. They have a free introductory tier, but then the next tier is $5/month plus a small resource usage fee. Really, their pricing is fantastic.
When you deploy with Railway, they'll shove your app into a Docker container and handle the management/scaling/etc. behind the scenes. In addition, they have the ability to stand up a database for you - as of the time of this writing, you can choose PostgreSQL, MySQL, Mongo, and Redis. That said, they of course allow you to deploy any docker image or volume, so if you're willing to put in a little more work I imagine you can make any stack work for you. That all means of course that Railway probably isn't the best solution if you need control over container orchestration, but for CRUD projects and startups it seems quite promising to me.
What's especially great is their integration with GitHub - it takes just a couple minutes to sign up for Railway, authenticate with GitHub, point it at a repo, and Railway takes care of the deployment from there. It has some magic to sense what kind of project your repo is and attempt to construct a build pipeline for your project right away. This doesn't work too well in .NET, but their interface is very sparse and easy to use to get up and going with it.
In the remainder of this article, I'm going to be demonstrating how to get a .NET 7 app deployed with Railway. I'll start with a simple ASP.NET API, and then I'll demonstrate getting Blazor working. I'd encourage you to follow along with me - it's no cost to you (you don't even need to type in a credit card) and I think you'll be impressed with how easy it is to get a little hobby app deployed with Railway.
Setting Up #
We'll just need three things to get started:
- An ASP.NET API
- A GitHub repo for that API
- A Railway account
Let's go top to bottom there
Setting up a new .NET API #
To begin with, I'll assume you have .NET installed, and you have a GitHub account. We can create a barebones API from the console:
dotnet new web -n RailwayAspApiDemoThis starts us off with the following, which will output "Hello, World!" at /:
var builder = WebApplication.CreateBuilder(args);var app = builder.Build(); app.MapGet("/", () => "Hello World!"); app.Run();In the MyApi directory, we can create a new repo. I'd recommend adding the VS .gitignore first, too.
git add .git commit -m "Getting Started"Once you've created a repo in GitHub, we can push it:
git remote add origin https://github.com/{username}/RailwayAspApiDemo.gitgit push -u origin masterFor reference, you can see this repo here.
Setting up Railway #
This is real simple - just go to railway.app, click login at the top, and then you can login with GitHub.
That's all you need in order to set up Railway. Seriously! Of course we're going to push ahead and click that shiny New Project button though...
Deploying our first API #
If we had containerized our API with Docker, Railway would have been perfectly happy for us to give it a dockerfile, and it would deploy that no problem. However, Railway also supports building and deploying .NET apps without needing to containerize them. Let's do that first, since we're trying to keep things barebones to get started.
Deploying From a GitHub Repo #
One of Railway's coolest features is that you can start a project off by pointing it at a GitHub repo, and it'll automatically (ish) deploy the repo, and set up hooks to listen to any changes on master and deploy then.
Configuring the Repository for Deployment #
After logging in, we should be faced with a big New Project button

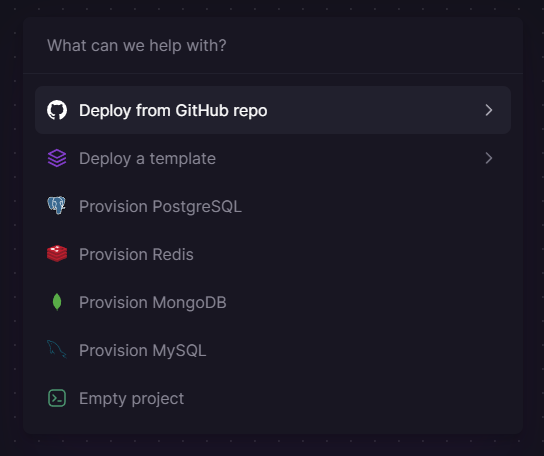
Here we'll select Deploy from GitHub repo
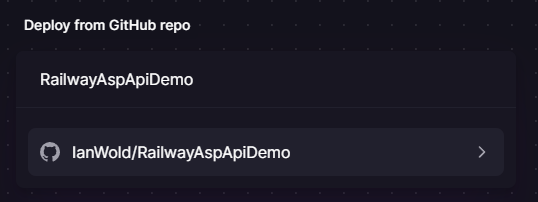
And then we can select the repo we just pushed
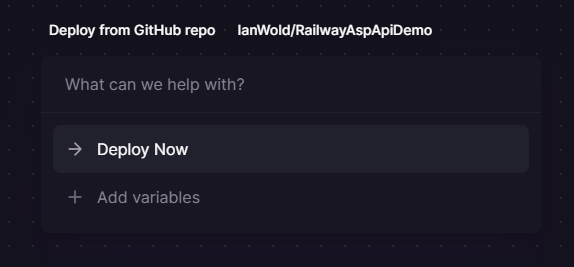
And why not try deploying right off the bat, so long as it's giving us the option?
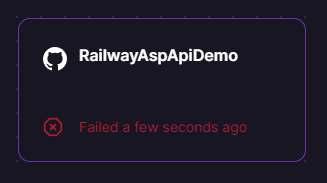
We should see the deployment fail in just a few seconds.
Debugging the First Errors #
Let's click on the deployment and inspect the deploy logs. The first thing to notice is that Railway actually did a really good job guessing what our build config should be. At the top of the logs, we can see:
setup │ dotnet-sdk ──────────────────────────────────────────────────────────── install │ dotnet restore ──────────────────────────────────────────────────────────── build │ dotnet publish --no-restore -c Release -o out ──────────────────────────────────────────────────────────── start │ ./out/RailwayAspApiDemoThat's really spectacular! Just because we had a .csproj file, it was able to fill this all out. But it's not all peaches and pringles, we've got a build error. And indeed we're able to see a failure just a few lines down:
#10 1.426 /nix/store/832ihvqk3vxgqqs5hvcyvg6bxqybky14-dotnet-sdk-6.0.403/sdk/6.0.403/Sdks /Microsoft.NET.Sdk/targets/Microsoft.NET.TargetFrameworkInference.targets(144,5): error NETSDK1045: The current .NET SDK does not support targeting .NET 7.0. Either target .NET 6.0 or lower, or use a version of the .NET SDK that supports .NET 7.0. [/app/RailwayAspApiDemo.csproj]Classic cloud moment - we need to know how to configure the .NET SDK version. Thankfully, Railway's docs, though sparse, do give us exactly what we need, an environment variable:
NIXPACKS_CSHARP_SDK_VERSION="7.0"This can be set on the Variables tab on the UI for the service:

Adding that variable should reschedule the deployment. Indeed, it works!
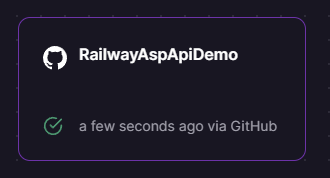
Just one thing - how do we see it? We'll need to generate a domain ourselves in the Settings tab in the UI for the service:
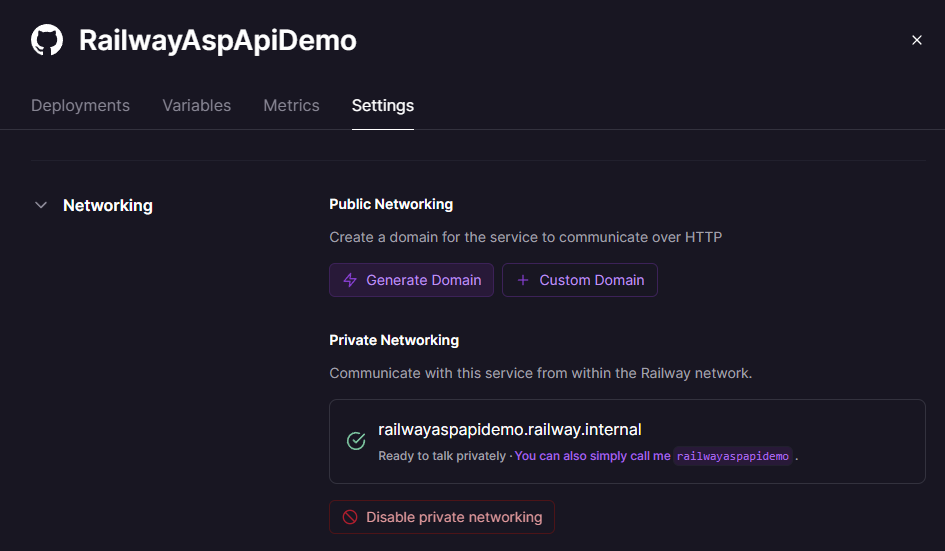
That will generate a slightly random .up.railway.app domain for you to get started with. Of course, you can add a custom domain here if you've purchased one, but I'm going to roll with this because somehow I managed to snag railwayaspapidemo-production.up.railway.app. Luky me!
Now we can navigate to that link and see "Hello, World!" right?
Right?
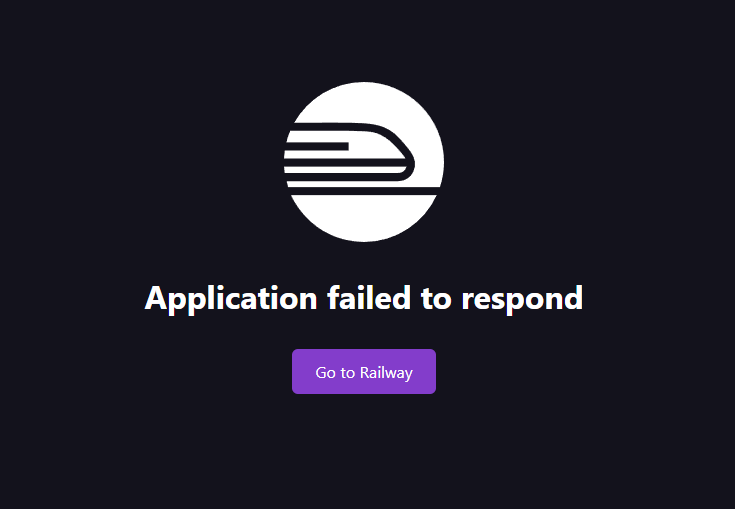
Well, the build deployed, so let's look at our deploy logs. I imagine yours will look similar to mine:
info: Microsoft.Hosting.Lifetime[14]Now listening on: http://0.0.0.0:3000info: Microsoft.Hosting.Lifetime[0]Application started. Press Ctrl+C to shut down.info: Microsoft.Hosting.Lifetime[0]Hosting environment: Productioninfo: Microsoft.Hosting.Lifetime[0]Content root path: /appIt says it's listening on port 3000, so it seems like the app is running, but why can't we see it? That's because when Railway deploys our app, it deploys it in a Docker container and generates a port for us. That means we either need to wire our app up to listen on the port that Railway dictates, or we need to tell Railway to use our nice, pretty port 3000. Luckily, Railway allows us to do both; the port number lives in the environment variable PORT, so we can either override that in Railway or consume the environment variable from our API.
Overriding Railway's Port Assignment #
To override Railway's port assignment, we can just set the environment variable in the variables tab, just like how we set the NIXPACKS_CSHARP_SDK_VERSION variable earlier:
PORT="3000"This will trigger a redeploy, and then we'll cross our fingers, refresh the app, and...

Nice!
Using Railway's Port in our API #
Alternatively, if you want to use the Railway-generated port, we can add just a bit of code to do that. Go ahead and delete the PORT environment variable if you added that.
We can update our Program.cs:
var builder = WebApplication.CreateBuilder(args); if (Environment.GetEnvironmentVariable("PORT") is not null and string environmentPort && int.TryParse(environmentPort, out int port)){ builder.WebHost.ConfigureKestrel(o => o.ListenAnyIP(port));} var app = builder.Build(); app.MapGet("/", () => "Hello World!"); app.Run();Aside: I hate the syntax is not null and string but I'm not going to complain. Too much.
Push that code to master and you should see Railway start deploying your API right away. Once that's up, you should see "Hello, World!" in the browser at your app.
Deploy From Docker or CLI #
I could type out a whole section here, but honestly I would just be copying Mark Rendle's excelent explanation. His tutorial was quite helpful for me getting started, and I'd like to give some credit where it's due. So, if you want to containerize your app and use the dockerfile instead of Railway's build steps, or if you want to deploy using Railway's CLI, please give his article a visit!
Deploying a Blazor App #
We've got our barebones API up and running, but it's missing a number of things yet. Frankly, that's a trivial example that's hiding a number of problems that still exist. I think Blazor's a good way to demonstrate these, especially since an ASP.NET-hosted Blazor WASM project requires sharing static files.
Setting up a Blazor Project #
Similar to the API we created above, we can get the default Blazor project initialized with
dotnet new blazorwasm --hosted -n RailwayBlazorDemoThis will create an "ASP.NET-hosted" Blazor app, which means we'll get a separate client and server project. Go ahead and run this locally - it will spin up the server, and the server will serve you the Blazor WASM client at root:
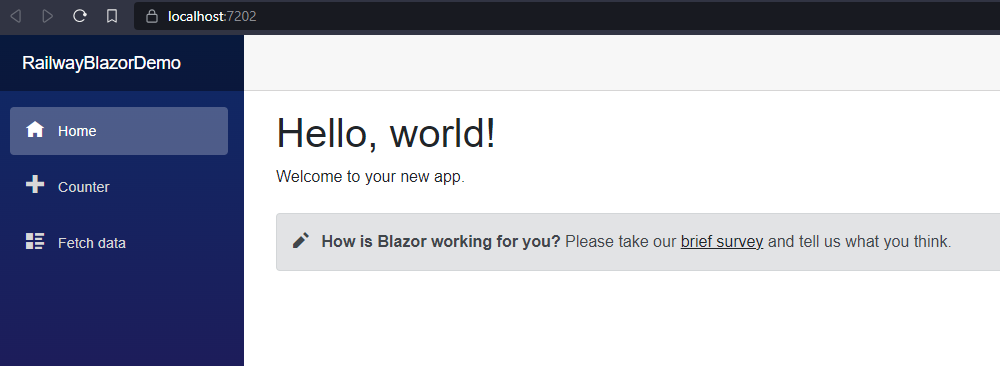
Go ahead and push this to a new repository (for reference you can see mine here) and create a new project in Railway, linking to this new repository.
That should start a deploy like before, and just like before you'll get a failed build. Remember to set the NIXPACKS_CSHARP_SDK_VERSION environment variable, and resolve the port issue however you choose. I'll choose to resolve it in my code. In order to do that, I'll edit the /Server/Program.cs file with the same lines we added to the barebones API. While that deploys, we also need to generate a domain for this app like we did before. And, don't you know it, I got lucky again: railwayblazordemo-production.up.railway.app! Neat.
Configuring Railway to Deploy the Server #
At this point, we might expect it to work. However, you'll notice after building Railway attempts to start the service several times, but fails with the same message:
/bin/bash: line 1: ./out/RailwayBlazorDemo.Client: No such file or directoryUh oh - we don't want to deploy the client, we want to deploy the server, because the server is configured to serve the client. The cause of this can be seen in the build logs like we'd expect - the automagic build figurer-outer guessed that we wanted to deploy the client:
setup │ dotnet-sdk_7 ───────────────────────────────────────────────────────────install │ dotnet restore ───────────────────────────────────────────────────────────build │ dotnet publish --no-restore -c Release -o out ───────────────────────────────────────────────────────────start │ ./out/RailwayBlazorDemo.ClientThis, like the other environment configuration issues in Railway, is simple to resolve. If you navigate back to the Settings tab on the UI for the service, scroll down and you'll see Deploy settings, with a helpful place to override the start command. In fact you can override any of the build steps in these settings, although you'll notice that they're pretty sparse. For our needs here though, those settings are all fine, so we'll just update the start command to ./out/RailwayBlazorDemo.Server:
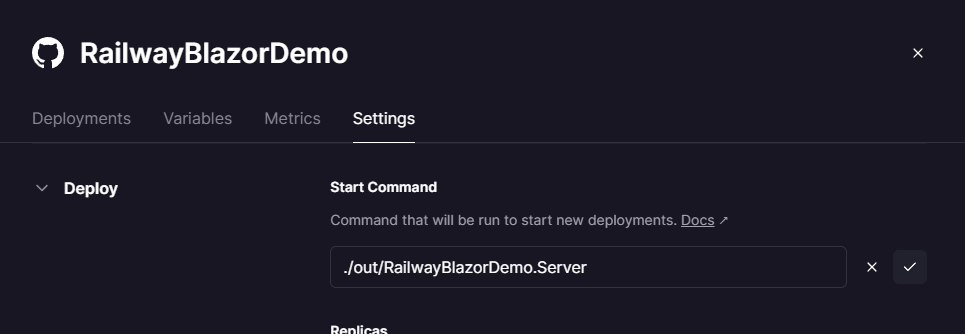
This will trigger a rebuild, and that should succeed! Our app should now be at the address we generated earlier, right?
Right?
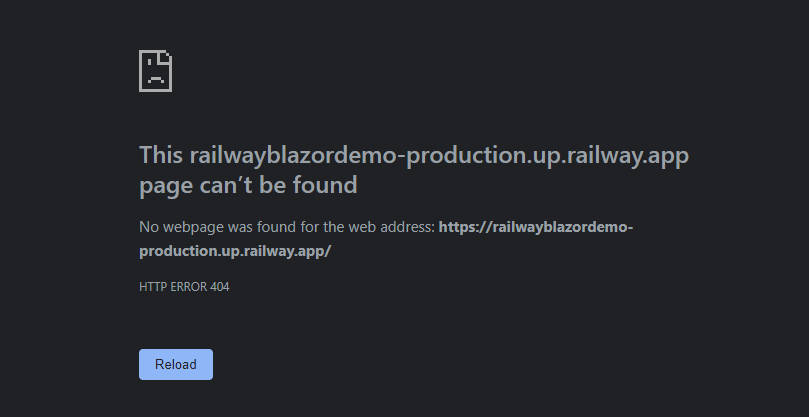
Configuring the ContentRootPath #
Well, that's interesting, because it's a different error than we got when first deploying the barebones API earlier. In that case, we got a nice error displayed with Railway's UI. This tells us that the server is up and running - of course though we verified that when the server started logging after it deployed a minute ago. Thus, we know that the problem is with the server being able to serve up the client app.
What's going on here isn't entirely obvious and it relies on a bit of knowledge about Docker to be able to intuit what's going on. There are two key lines in the logs. The key line is in the deploy logs:
Content root path: /appWhat's going on is that the client is stored as a static file on the server, and the server needs access to that file to be able to serve it, of course. ASP calls the root directory for static files the "content root path", and this one is a bit bunked.
This has a code solution. Replace the first line of Server/Program.cs with the following:
var builder = WebApplication.CreateBuilder(new WebApplicationOptions() { Args = args, ContentRootPath = "./"});Yes, ContentRootPath is supposed to default to its root directory, but there's some weirdness that got introduced ... *checks notes* ... somewhere? Honestly, I'm not sure how this solves it - I've just debugged enough weird directory issues with Docker in my professional career that it triggered my spidey senses.
Making that change and pushing to master will trigger a rebuild. Then, as if by magic, our app is working at the link:
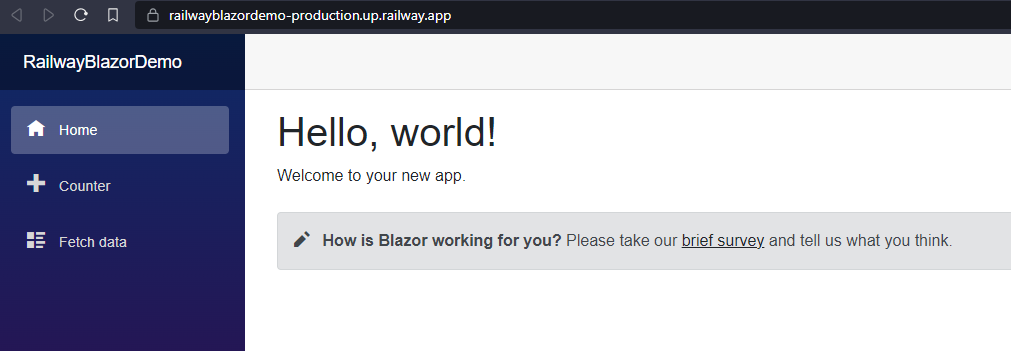
Conclusion #
Despite a few bumps in the road (which, apart from the content root path issue, make sense in context) we were able to get two .NET apps deployed in no time and with no money! In future, I think we'll explore adding a database with Railway and hooking our Blazor app up to it.
I think this is the sort of case where Railway really excells. If you don't have an overly complicated backend system, deploying with Railway is extremely fast, simple, and cheap. Their focus on this area significantly reduces the barrier to entry to get a hobby app out the door. And, it seems that Railway does have enough capability to scale if you do attract users - at least through the first phase or two. Because of these factors, I'll be using Railway to deploy all my hobby apps in the future here! I'm very excited to discover a cloud provider this capable at this price.
Railway's limitations are very apparent though - such is the tradeoff with the simplicity they've achieved. While you certainly can deploy any container with Railway, an overly complicated backend system could potentially become more burdensome to maintain than not. Really though, I don't know where that boundary is, but I suspect it's decently high enough that even if I do take some pet projects into production properly, I can rely on Railway to be able to serve them adequately.
Resources #
You can see my GitHub repos used in this article here:
Railway's documentation is pretty good, but their Discord server is an excellent and lively place to get help when you need it.